
BE PREPARED
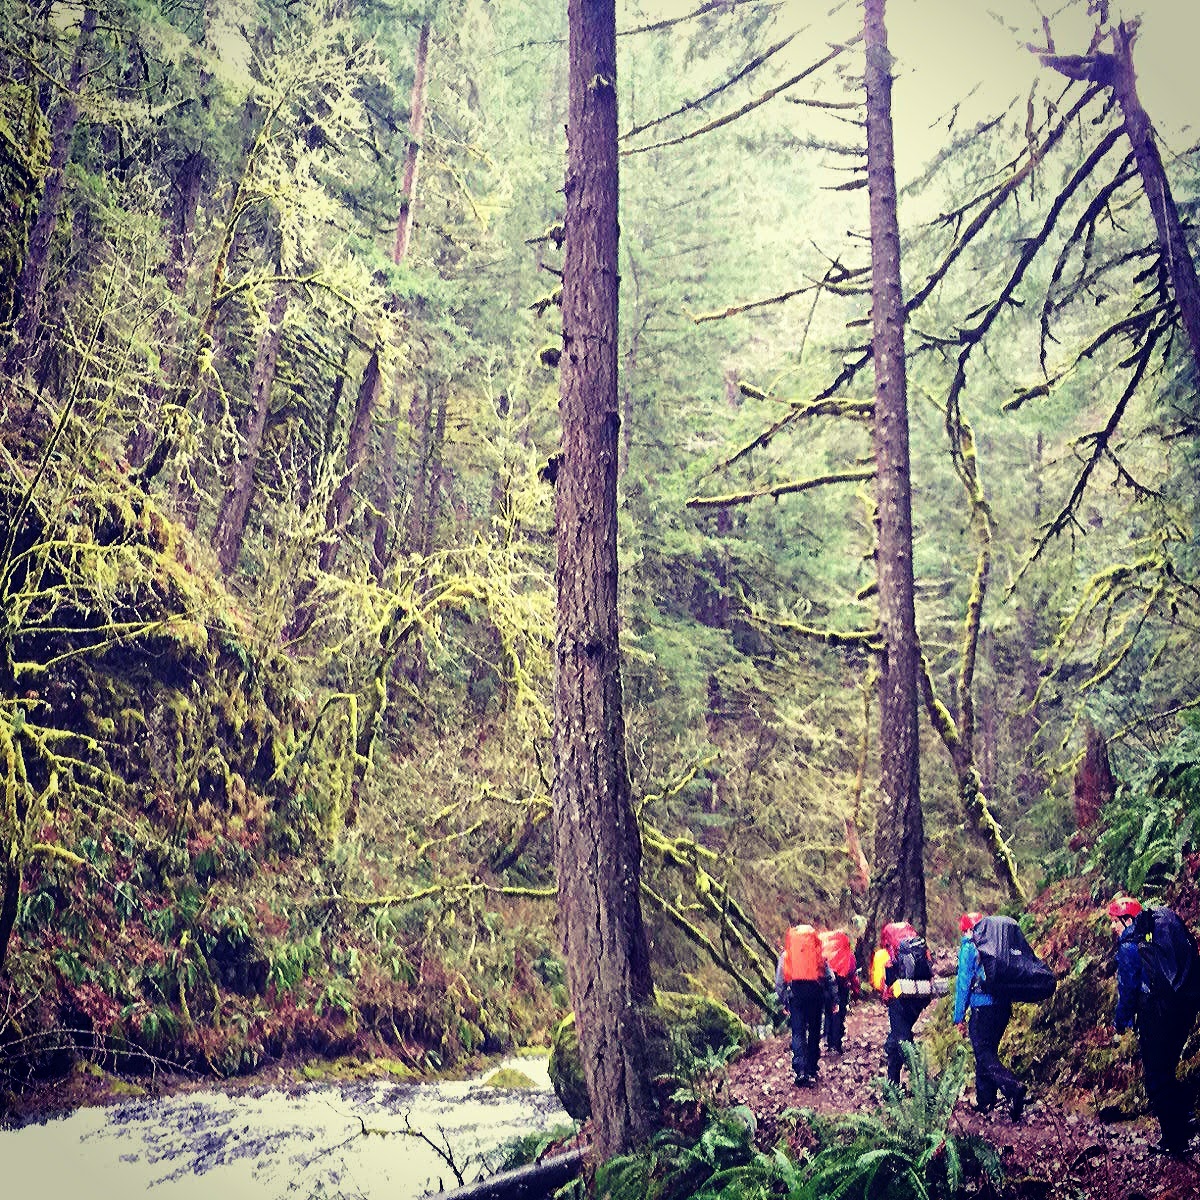
Weather conditions in the Columbia River Gorge are notoriously harsh and ever-changing. Conditions at the start of the hike may differ dramatically from those hours later, or at river level versus the summit of Larch Mountain. Below is a list of the most basic equipment that should be carried on every hike, whether it's planned for a few hours, or multiple days.
MAKE A PLAN
Plan your route, and an alternative. Know the various exits that you may need to employ. Research maps, and recent trip reports if at all possible to learn current trail conditions. With recent reconstruction and restoration efforts as a result of the wildfires in the gorge, many trails are still closed, rerouted, and look dramatically different from what you may be familiar with. Please respect trail closures in place to protect hikers from overly hazardous conditions, and wildlife restoration.
Share your plan with a trusted person. Make sure they know what route you intend to take, and the times you expect to be in and out of the field. Give a clear and precise time that they should call for help if you have not returned or contacted them.
IS THIS AN EMERGENCY?
If this is an emergency, call 911 immediately. Keep your phone accessible and save your battery for rescue personnel to contact you.
Trail Smarts
Trail smarts would be the wilderness kin to street smarts. These are skills and common sense practices developed over years on trail. These concepts are simple, but take time to engrain as a habit.
Know Where You Are
This is easily the most important piece of information. With knowledge of where you are, the next two steps can be problem solved and figured out. This starts with at least a basic knowledge of the area. You can find where you are, but it’s far simpler, and faster, to simply keep track of yourself as you move. Make notes on your map, and have a mental image of where you should be going and what you should be seeing. Maintain awareness of the cardinal directions as you travel, note creek crossings, trail junctions, roads, viewpoints, and significant land features like crossing over major ridgelines that are easily recognizable, and readily identifiable on a map to give you an immediate location. Even with a full topographic quad in front of you, you should be able to quickly block out a relatively small area that you are in.
Know where you have been
People don’t immediately recognize that they are lost. They often travel for hours before registering that something is not right. You must keep note of what you have passed along the way. This will help you discover where you may have made an error, and could provide an immediate solution. How many creeks have you crossed? How many trail junctions and which trail did you take? Was there signage? Did you look back at the junction after you passed to remember the other perspective? Can you navigate yourself back to some point along your previous path if needed?
Know Where You’re Going
You should have a final destination before you go hiking, but it can change along the way with trail closures and weather conditions. Be aware of what to expect coming up along your intended route. Are you crossing an unexpected major creek, road, or trail? Do not let your brain distort reality to match the theory. Don’t disregard that unexpected trail junction because it was probably too small to be noted on the map. Maybe it was, but it may also be an indication you’re on the wrong route.
Know How to Get There
Be it trail, cross country, or a combination of both. Take the time to examine your map for trail information, process a few steps ahead to have an expectation of what landmarks you should see coming up, and take note if you come to something unexpected.
Am I Lost?
Lost people generally fall into two categories, panic or denial. Almost everyone who was lost had that voice in their head saying “something’s not right” long before they outwardly came to that conclusion. Keeping the trail smart points in mind while you’re on mission should help clue you in faster. When that voice starts to nag you, take a break, and STOP.
- SIT - The most important step, you need to stop moving. Have a drink of water, and clear your head.
- THINK - Replay your actions from the trailhead on. Try to identify your current location, last place you knew for sure, or the point where you made an error.
- OBSERVE - Take stock of your current situation. Your intended route, equipment, time of day, physical condition, terrain, and anything else that may impact how you proceed. If you think you know where you are, consult with team members and use other navigational resources to verify.
- PLAN - You will need to make your decisions and create a plan. Communicate if possible, be prepared with your intended route, a brief explanation, and where you may have gone wrong.
THE TEN ESSENTIALS

Running out of daylight is one of the most common scenarios for overdue hikers in the gorge. Once the sun sets, chances of getting lost or injured increase immensely. Always carry a flashlight and/or headlamp and extra batteries.

Hypothermia is one of the most common hazards, and biggest killer in the Oregon wilderness. It's easy to misjudge weather, or underestimate hypothermia risks, even in the summer. Always pack extra layers for protection in wind and rain.

If your hike goes longer than expected, extra food and water can be the difference between an inconvenient delay, and an outright survival situation. Dehydration compromises several functions of your body, and is generally more critical than food.
You should always carry a map and compass, but it is also important to know how to use them. A GPS receiver or cell phone are also extremely helpful, but don't rely on them. Many areas in the gorge have limited or no cell service. Cellphones are not an appropriate substitute for a flashlight.
Carry a basic first aid kit, and again, know how to use it. If you have critical need of medication, carry an additional supply. Self reliance in a wilderness setting is important when help may be hours, or days away.

A knife is an invaluable tool with countless uses in emergency or survival situations. Collecting fire wood or shelter material, making field equipment repairs, cutting cordage or bandages are all things that can be difficult when needed if you don't have a sharp knife.
A basic fire starting kit should include a heat source (lighter, ferro rod, waterproof matches), and tinder or fire starter material. A simple fire when done safely can keep you warm, provide light and morale in hard situations, dry equipment, and signal rescuers.
Large, heavy-duty garbage bags, or tarps can quickly be used to make expedient emergency shelters, as well as protect your gear (like extra clothing) from getting wet while in your pack. Shelter in our typical rainy, windy, and cold conditions limits exposure and increases your survivability.
A whistle, or light source can dramatically increase your chances of being heard or seen. Whistle sounds carry further in the wilderness, and require much less energy than yelling. Even small light sources have the chance to be seen from incredible distances.
Often overlooked, sun exposure in the pacific northwest summers can lead to hyperthermia (overheating), dehydration, or mild to severe sunburns. In winter months and snow conditions reflected sunlight can lead to snow blindness. Carry sunglasses and sunscreen with you, even when it seems unlikely you'll need it.

EQUIPMENT
Layering
At any time of year, the most effective way to dress is by layering. This is a time tested method in use for thousands of years, including modern times from Everest to Antacrtica. Layering simply means wearing one layer of clothing over another. Most experienced wilderness people don’t carry a single heavy parka into the backcountry. We need variability and customization to balance the heat loss caused by the environmental conditions, and the heat generated by our body and level of work. Carrying and wearing multiple lightweight layers allows for that adaptability at a much more granular level, to add or remove protection in small increments. In addition, layers trap additional dead air between them and provide a weight-free insulative bonus.